1/29/14

PTU Honored Scraps and Marika

Love

This tutorial was written on January 29,2014. 
Any similarities to another tutorial is purely coincidental.
All my tutorial are register with My Free Copyright. 
Please do not claim as your own.
This tutorial writer assumes you have a working 
knowledge of using Paint Shop Pro.
This tutorial was done in Paint Shop Pro9,
but can be adapted to use in other 
Paint Shop Pro versions.


SUPPLIES NEEDED

Tube of choice: I'm using the awesome work of Marika.
Please do not use unless you have a license to do so. 
You can get her tubes HERE

Scrapkit of Choice: I am using PTU Honored Scraps -Dark Heart
You can purchase it HERE ...Thank you Patty

Mask of Choice: I am using Weescotlass Creations Mask #3
You can download it HERE...Thanks Cat

Filters used:Eye Candy 4000 gradient glow - HERE

Font for Name is Ribbon
Copy write is always done in Pixelette  HERE

Drop shadow use through out H-2/V-2/O-60/B-5.75

Please leave a thank you when you downloading for supplies.

my tag is just a guide...please use your imagination 
and make the tag your own you do not have to 
use any of the supplies I used.


     LET'S BEGIN

Open up new raster layer 800x 800/copy/paste frame #-4 and 8/resize
frame #4 by 120%/place frame #1 on top of frame #4/merge down/resize
frame #8/place this frame in right hand side,lower corner/deform tool
turn frame slightly to right

magic wand/click inside merge frame/selections/modify/expand by 10/copy
paste paper of choice/resize/selections/invert on frame/delete on paper
layer/place paper underneath frame/copy/paste closeup tube/resize if 
needed/delete on tube layer/selections/none/add drop shadow to tube 
and each frame

Copy/paste paper of choice/resize to fit canvas/layers/load/save/mask
find your mask/and set with these setting/click ok

now comes the time when you can let your creativity flow/add any other 
elements you wish to use/resize if needed/add drop shaow to each element

Copy/paste your main tube/resize if needed/place where you would think
it will look best/add drop shadow/resize tag if needed

copy/paste both word art/place the love mask word art behind close up tube 
and place pink word art at lower right/resize this/add black shadow gradient
add drop shadow

add your watermark and copyright credits/give it a slight gradient glow ...
...now give your tag to a friend.

You're done...thank you for trying my tutorial
please send me a copy so that I can show case it on my blog

1/17/14

PTU Honored Scraps and The Vintage Angel

Serenity

This tutorial was written on January 17,2013. 
Any similarities to another tutorial is purely coincidental.
All my tutorial are register with My Free Copyright. 
Please do not claim as your own.
This tutorial writer assumes you have a working 
knowledge of using Paint Shop Pro.
This tutorial was done in Paint Shop Pro9,
but can be adapted to use in other 
Paint Shop Pro versions.


SUPPLIES NEEDED

Tube of choice: I'm using the awesome work of The Vintage Angel.
Please do not use unless you have a license to do so. 
Get Them HERE

Scrapkit of Choice: I am using PTU Honored Scraps IB The Vintage Angel 2-1
You can purchase it HERE ...Thanks Patty

Template of choice:I am using Leah Template #13
You can download it HERE...Thanks Leah

Mask of Choice: I am using Insatiable Dreams Mask #59
You can download it HERE.... Thank You Cat

Filters used:Eye Candy 4000 gradient glow - HERE
             Eye Candy 4000 glass

Font for Name is 0 Whoa DNA HERE
Copy write is always done in Pixelette  HERE

Drop shadow use through out H-2/V-2/O-60/B-6.85

Please leave a thank you when you downloading for supplies.

my tag is just a guide...please use your imagination 
and make the tag your own you do not have to 
use any of the supplies I used.


     LET'S BEGIN

Open up Template and ShiftD and close original...delete 
copyright layer/close all layers/copy/paste paper of choice
resize to fit canvas/layers/load/save mask/find your mask
and set with these setting/click ok


On the following raster layers follow these directions...

activate back circle layer/copy/paste paper of choice/resize 
paper/selections/invert on circle layer/delete on paper layer
merge down/add drop shadow

activited right square layer/copy/paste paper of choice/resize 
paper/selections/invert on square layer/delete on paper layer
merge down/add drop shadow to square layer

activited left square layer/copy/paste paper of choice/resize 
paper/selections/invert on square layer/delete on paper layer
merge down/add drop shadow to square layer

activited square top layer/copy/paste paper of choice/resize 
paper/selections/invert on square layer/delete on paper layer
merge down/add drop shadow to square layer

on thin square top/selections/float/deloat/modify/smooth with
setting/click ok/add light color from paper/effects/eye candy
glass with these setting/click ok


activited square bottom layer/copy/paste paper of choice/resize 
paper/selections/invert on square layer/delete on paper layer
merge down/add drop shadow to square layer

on thin square bottom/selections/float/deloat/modify/smooth with
setting/click ok/add dark color from paper/effects/eye candy
glass with setting shown above/click ok


leave right circle back layer as is/activate right circle top/copy
paste paper of choice/resize paper/selections/invert on right circle 
layer/delete on paper layer/merge down/add drop shadow to both circle 
layers

leave left circle back layer as is/activate right circle top/copy
paste paper of choice/resize paper/selections/invert on left circle 
layer/delete on paper layer/merge down/add drop shadow to both circle 
layers

activited rectangle layer/copy/paste paper of choice/resize 
paper/selections/invert on rect layer/delete on paper layer
merge down/add drop shadow to rect layer

on thin rectangle/selections/float/deloat/modify/smooth with
setting/click ok/add light color from paper/effects/eye candy
glass with settings shown above/click ok

add any other elements you wish to use/resize if needed/add drop 
shadow to each element/place where they will look best

copy/paste one of the word art that is in the kit/resize by 70%
add light gradient glow 2x/add drop shadow 

add your watermark and copyright credits/give it a slight gradient 
glow.....now give your tag to a friend.

You're done...thank you for trying my tutorial
please send me a copy so that I can show case it on my blog


1/15/14

PTU LadyHawwk Designs and Rachel Anderson

Always

This tutorial was written on January 15,2014. 
Any similarities to another tutorial is purely coincidental.
All my tutorial are register with My Free Copyright. 
Please do not claim as your own.
This tutorial writer assumes you have a working 
knowledge of using Paint Shop Pro.
This tutorial was done in Paint Shop Pro9,
but can be adapted to use in other 
Paint Shop Pro versions.


SUPPLIES NEEDED

Animation Shop  HERE

Tube of choice: I'm using the awesome work of Rachel Anderson.
Please do not use unless you have a license to do so. 
You can get her tubes HERE

Scrapkit of Choice: I am using PTU LadyHawwk Designs IB-Rachel
Anderson 15-2 ... You can purchase it HERE ...Thank you Cat

Mask of Choice: I am using Insatiable Dreams Mask#2
You can download it HERE...Thanks Cat

Animation of Choice: Iam using Scrappy bit of Fun animation #354 and #370
you can download it HERE...Thank you Simone

Filters used:Eye Candy 4000 gradient glow - HERE
AAA Frame -Foto Frame  HERE

Font for Name is AeroliteCPtwo
Copy write is always done in Pixelette  HERE

Dropshadow use through out H-3/V-3/O-60/B-8.76

Please leave a thank you when you downloading for supplies.

my tag is just a guide...please use your imagination 
and make the tag your own you do not have to 
use any of the supplies I used.


     LET'S BEGIN

Open up new raster layer 800x 800/copy/paste frame #2/magic
wand/click inside frame/selections/modify/expand by 10/copy
paste paper of choice/resize/selections/invert on frame
delete on paper/place paper underneath frame/selections/none
copy/paste frame #1/resize by 70%/raster deformed tool/slightly
angle this frame/place frame into lower left side of the first 
frame/copy/paste paper of choice/resize/selections/invert on 
frame/delete on paper/place paper underneath frame/selections
none/copy/paste frame #3/resize by 70%/raster deformed tool
slightly angle this frame/place frame into upper right side 
of the first frame/copy/paste paper of choice/resize/selections
invert on frame/delete on paper/place paper underneath frame
selections/none/add drop shadow to each frame

Copy/paste paper of choice/resize to fit canvas/layers/load
save/mask/find your mask/and set with these setting/click ok


background layer/flood fill with the color white/effects/AAA
Frame/foto frame with these setting/click ok


copy/paste element #3/resize to fit frame #3/place on right
side of frame/activate frame #3/click inside/copy/paste tube 
of choice/selections/invert on frame/delete on tube/add drop 
shadow

activate frame #1/copy/paste white butterfly/place in center of
frame/duplicate and close/on original butterfly/blend/soft light
open duplicate/place underneath and lower opacity to 50%/lower
opacity of original to 50%/add light drop shadow to bottom butter
fly

now comes the time when you can let your creativity flow/add any 
other elements you wish to use/resize if needed/add drop shaow
to each element

Copy/paste your main tube/resize if needed/place where you would
think it will look best/add drop shadow/resize tag if needed

I wanted the wordart font to match the name font/I chose Aerolite 
CPtwo/write the word Always/in white and.05 black/size 62/gradient 
glow/fat/add drop shadow

add your watermark and copyright credits/give it a slight 
gradient glow ...

To Animate

Close all layers except
background
mask
frame paper
and both butterflies

copy/merge/paste as a new animation into animation shop/find
animation #370/edit/select all/on new animation/duplicate tag 
for 21 frames/go to frame #1/edit select all/click on animation
copy/paste into selected frame/paste three times in different 
places

go back to psp and close the layers that are open and open the
layers that are close/copy/merge/paste as a new animation/duplicate
tag for 21 frames/open up animation #354/go to first frame/edit
select all/animation/flip/copy into selected frame/place in the 
middle of the jar/animation/frame properties/change to 15/view 
animation/if satisfied/save as gif

...now give your tag to a friend.

You're done...thank you for trying my tutorial
please send me a copy so that I can show case it on my blog


1/14/14

PTU LadyHawwk Designs And Thomas Hoover

Everyday Is Love

This tutorial was written on January 14,2013. 
Any similarities to another tutorial is purely coincidental.
All my tutorial are register with My Free Copyright. 
Please do not claim as your own.
This tutorial writer assumes you have a working 
knowledge of using Paint Shop Pro.
This tutorial was done in Paint Shop Pro9,
but can be adapted to use in other 
Paint Shop Pro versions.


SUPPLIES NEEDED

Animation Shop  HERE

Tube of choice: I'm using the awesome work of Thomas Hoover.
Please do not use unless you have a license to do so. 
Get Them HERE

Scrapkit of Choice: I am using PTU LadyHawwk Designs IB Thomas Hover IB-5-1
You can purchase it HERE ...Thanks Cat

Mask of Choice: I am using Insatiable Dreams Mask #376
You can download it HERE.... Thank You Cat

Animation ofChoice: Iam using Scrappy Bit of Fun Animation #21
You can download it HERE....Thank you Simone

Filters used:Eye Candy 4000 gradient glow - HERE
AAA Frame-Foto Frame-HERE

Font for Name is Tunga
Copy write is always done in Pixelette  HERE

Drop shadow use through out H-2/V-2/O-60/B-6.85

Please leave a thank you when you downloading for supplies.

my tag is just a guide...please use your imagination 
and make the tag your own you do not have to 
use any of the supplies I used.

     LET'S BEGIN

Open up Frame of Choice/click inside frame/selections/modify
expand by 12/copy/paste paper of choice/resize to fit frame
selections/invert on frame layer/delete on paper layer/copy
paste second frame/resize so frame is on top of first frame
merge down

Copy/paste paper of choice/resize to fit canvas/layers/load
save mask/find your mask and set with these setting/click ok


new layer raster/flood fill with white/effects AAA Frame with 
these setting/click ok


Click inside frame/copy/paste closeup tube/resize if needed
add drop shadow to frame and tube

add elements to your frame to create a cluster/resize elements
if needed/add drop shadow to each element/place where they will 
look best on your frame

copy/paste word art that is in the kit/resize by 60%/effects/eye 
candy 4000/gradient glow/with fat settings/add drop shadow 

add your watermark and copyright credits/give it a slight gradient 
glow.....

To Animate

Copy/merge/paste as a new animation.Edit/duplicate tag 6x/click on 
tag/then 5x/click on tag/then 3x for a total of 53 frames/click on 
tag/edit/select all
Find animation #21/edit/select all/copy into selected frame
Paste into you new animation/if satisfied/save as gif

now give your tag to a friend.

You're done...thank you for trying my tutorial
please send me a copy so that I can show case it on my blog

1/11/14

CDO BabyCakes Scraps and Michael Landefeld

Party Like A Rock-Feel The Music

This tutorial was written on January 10,2014. 
Any similarities to another tutorial is purely coincidental.
All my tutorial are register with My Free Copyright. 
Please do not claim as your own.
This tutorial writer assumes you have a working 
knowledge of using Paint Shop Pro.
This tutorial was done in Paint Shop Pro9,
but can be adapted to use in other 
Paint Shop Pro versions.


SUPPLIES NEEDED

Animation Shop..Get it HERE

Tube of choice: I'm using the awesome work of Michael Landfeld
Please do not use unless you have a license to do so. 
Get Them HERE

Scrapkit of Choice: I am using PTU BabyCakes Scraps IB-Michael Landfeld 19-3
You can purchase it HERE ...Thanks Lynne

Template of choice:I am using Additive Pleasures CM Template #2
Feel The Music.....You can download it HERE...Thanks Tamie

Mask of Choice: I am using Insatiable Dreams Mask #376 
You can download it HERE.... Thank You Cat

Animation of Choice: I am using Scrappy Bit of Fun animation #241 and #328

Filters used:Eye Candy 4000 gradient glow - HERE

Font for Name is MV Boli
Copy write is always done in Pixelette  HERE

Drop shadow use through out H-2/V-2/O-60/B-6.85

Please leave a thank you when you downloading for supplies.

my tag is just a guide...please use your imagination 
and make the tag your own you do not have to 
use any of the supplies I used.


     LET'S BEGIN

Open up Template and ShiftD and close original...delete 
copyright layer/close all layers/copy/paste paper of choice
resize to fit canvas/layers/load/save mask/find your mask
and set with these setting/click ok


On the following raster layers follow these directions...

leave glittered circle as is/activate large circle layer/copy
paste paper of choice/resize paper/selections/invert on circle
layer/delete on paper layer/merge down/add drop shadow

leave glittered arrow as is/activate arrow layer/copy/paste 
paper of choice/resize paper/selections/invert on arrow layer
delete on paper layer/merge down/add drop shadow to arrow layer

leave glitter rectangle as is/activate rectangle layer/copy
paste paper of choice/resize paper/selections/invert on 
rectangle layer/delete on paper layer/merge down/leave word art
as is

leave glittered long rectangle asis/activate long rectangle
layer/copy/paste paper of choice/resize paper/selections/invert 
on rectangle layer/delete on paper layer/merge down

leave glitter rectangle 2 as is/activate rectangle layer/copy
paste paper of choice/resize paper/selections/invert on 
rectangle 2 layer/delete on paper layer/merge down/leave word art
as is/leave all other layer as is

copy/paste main tube/resize if needed/place where you would like 
it to be/add drop shadow

add any other elements you wish to use/resize if needed/add drop 
shadow to each element/place where they will look best

if animating close mask frame/open new layer and fill with white
effects/AAA frame with these setting/click ok


add your watermark and copyright credits/give it a slight gradient 
glow.....

To Animate

Close the following layers
scull
copy of raster 1
small text 2
ribbon
double hearts
shoes
star
main tube
music note2
ticket
copyright
name
copy/merge/paste the remaining layers into animation shop
paste as a new animation/find animation #328
on your new animation/duplicate frame until you have 19 frames
edit/select all/click on frame one/go to animation/edit select 
all/paste into the selected frame/place three time on the long
rectsngle/spaced apart/now go to the last frame of your tag
click on it/duplicate until you have 26 frames/go to frame 1
edit/select all/find animation #241/edit select all on this 
animation/copy/paste into selected frame/place two times/one on
each speaker

go back to psp and close the layers you have open/open the layers
you have close(see up top)copy/merge/paste into animation shop as
a new animation/duplicate until you have 26 frames/edit/select all
copy/paste into selected frame/be careful of your placement/use 
rectangle as your guide/once in place/view animation/if satisfied
save as gif......now give your tag to a friend.

You're done...thank you for trying my tutorial
please send me a copy so that I can show case it on my blog


1/9/14

CDO Foxy Designz and Cartoon Pink - Hugs and Kisses

Hugs and Kisses-Baby Got Back

This tutorial was written on January 9,2014. 
Any similarities to another tutorial is purely coincidental.
All my tutorial are register with My Free Copyright. 
Please do not claim as your own.
This tutorial writer assumes you have a working 
knowledge of using Paint Shop Pro.
This tutorial was done in Paint Shop Pro9,
but can be adapted to use in other 
Paint Shop Pro versions.


SUPPLIES NEEDED

Animation Shop - HERE

Tube of choice: I'm using the awesome work of Cartoon Pink.
Please do not use unless you have a license to do so. 
You can get is tubes HERE

Scrapkit of Choice: I am using PTU Foxy Designz - Amy Matthews-IB-39-2
you can purchase it tomorrow at CDO ...Thanks Foxy

Timeline Template of Choice: I am using Milliespspmadness Template #34
you can get it HERE......Thank you Millie

Tag Template of Choice: I am using Milliepspmadness Template #335
you can get it HERE.....Thank you Millie

Mask of Choice for tag: I am using Insatiable Dreams Mask #306
you can down load .....HERE  Thank you Cat

Animation of Choice: I am using Scrappy Bit of Fun animation Camera Flash #2
and animation # 416....you can download it HERE ...Thanks Simone

Filters used:Eye Candy 4000 gradient glow - HERE
AAA Frame-Foto Frame - HERE

Font for Name is Lauren Script
Copy write is always done in Pixelette  HERE

Drop shadow use through out H-2/V-2/O-50/B-5.00

Please leave a thank you when you downloading for supplies.

my tag is just a guide...please use your imagination 
and make the tag your own you do not have to 
use any of the supplies I used.

     LET'S BEGIN

Open up Template and ShiftD and close original...delete copyright
layer/close all layers/

activate rectangle/copy/paste paper of choice/resize paper/selections
invert on rectangle layer/delete on paper layer merge down/add drop 
shadow

activate long rectangle/copy/paste paper of choice/resize paper
selections/invert on rectangle layer/delete on paper layer merge 
down/add drop shadow

leave black long rectangle/and dotted rectangle as is/add drop shadow

activate rectangle/copy/paste paper of choice/resize paper/selections
invert on rectangle layer/delete on paper layer merge down/add drop 
shadow

leave both small rectangle as is/add drop shadow

activate circle/copy/paste paper of choice/resize paper/selections
invert on circle layer/delete on paper layer merge down/keep activated
copy/paste tube of choice/selections/invert on paper layer/delete on
tube layer/copy/paste frame/resize to fit circle/duplicate tube/place
on top of frame/using eraser tool/erase/excess bottom portion of tube 
showing/(see my tag)/add drop shadow to bottom tube leave canvas frame 
as is

add word art from kit/resize and place where you want/add drop shadow

copy/paste/element 7/resize/rotate/20 left/place on left circle
duplicate/mirror/place on right circle/add drop shadow to both

add any other elements you wish to use/resize/add drop shadow to each 
element/place where they will look best

add your watermark and copyright credits/give it a slight gradient glow.....
now give your tag to a friend.

Avatar

open up new raster 174 x 147/add paper/2 inch border/and some elements
resize elements/add drop shadow to elements/add copyright and name

Tag


Open up Template and ShiftD and close original...delete copyright layer
close all layers/copy/paste paper of choice resize to fit canvas/layers
load/save mask/find your mask and set with these setting/click ok


open back ground layer/effects AAA Frame-foto frame with
these setting/click ok


activate large pink circle layer/copy/paste paper of choice/resize paper
paper/selections/invert on pink circle layer/delete on paper layer/merge 
down

activate large brown rounded square layer/copy/paste paper of choice/resize 
paper/selections/invert on brown square layer/delete on paper layer/merge 
down

recolor pink rounded square to make it darker/select color from paper/add 
drop shadow

activate large pink circle 2 layer/copy/paste paper of choice/resize paper
paper/selections/invert on pink circle 2 layer/delete on paper layer/merge 
down

activate large brown rounded square 2 layer/copy/paste paper of choice/resize 
paper/selections/invert on brown square 2 layer/delete on paper layer/merge 
down

activate medium dark pink circle layer/copy/paste paper of choice/resize 
paper/selections/invert on dark pink circle layer/delete on paper layer/merge 
down

recolor pink rounded square to make it darker/select color from paper/add 
drop shadow

activate medium rectangle layer/copy/paste paper of choice/resize paper
selections/invert on medium rectangle layer/delete on paper layer/merge 
down

recolor both small rectangle to make it grey/select color from paper/add drop
shadow/leave dotted rectangle as is

add any other elements you wish to use/resize/add drop shadow to each 
element/place where they will look best

add your watermark and copyright credits/give it a slight gradient glow.....
now give your tag to a friend.

To animate

on timeline/copy/paste tag into animation shop/find camera flash animation
edit/select all/duplicate tag 6 times/on animation/copy/paste into selected
frame/on tag edit/select all/place flash on camera/click on frame 6/duplicate
to get 19 frames

open second animation/edit/select all/mirror animation/copy into selected
frame/place onleft side of tag/view animation/if satisfied save as gif

on tag close the following layers
name/copyright/word art
heart/tube/compact/dotted square
heart line/both half tube/and both small rounded square

copy/merge/paste remaining tag into animation shop/duplicate tag 6 times
place flash on both cameras/on the 6 frame/click on it/duplicate until
you have 19 frames/copy second animation/place on both sides of rectangle
layer

go back to paint shop pro/close those layers and open the rest of the layers
copy/merge/paste into animation shop/duplicate 19 times/copy into selected
frame/make sure you place in right position/see my tag for placement/if
satisfied/save as gif

You're done...thank you for trying my tutorial/please send me a copy so that 
I can show case it on my blog/send to.... riggsbee53@gmail.com

1/5/14

CDO Honored Scraps and Michael Calandra - Angel 2 Devil

Angel 2 Devil

This tutorial was written on January 4,2013. 
Any similarities to another tutorial is purely coincidental.
All my tutorial are register with My Free Copyright. 
Please do not claim as your own.
This tutorial writer assumes you have a working 
knowledge of using Paint Shop Pro.
This tutorial was done in Paint Shop Pro9,
but can be adapted to use in other 
Paint Shop Pro versions.


SUPPLIES NEEDED
Animation Shop3 ....HERE

Animation of Choice: I am using Scrappy Bit of Fun Animation #71
you can download   HERE .... Thank you Simone

Tube of choice: I'm using the awesome work of Michael Calandra.
Please do not use unless you have a license to do so. 
Get Them HERE

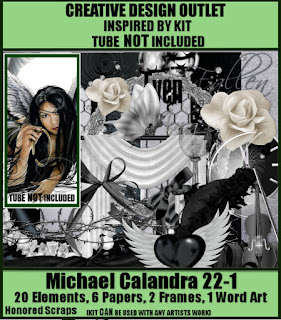
Scrapkit of Choice: I am using PTU Honored Scraps Michael Calandra IB-22-1
You can purchase it HERE ...Thanks Patty

Template of choice:I am using Aqua Rebel315 Dsnz Template #97
You can download it HERE...Thanks Aqua

Mask of Choice: I am using CM Tonya's Mask #
You can download it HERE.... Thank You 

Filters used:Eye Candy 4000 gradient glow - HERE

Font for Name is Carbon Block
Copy write is always done in Pixelette  HERE
AAA Frame - Foto Frame   HERE

Dropshadow use through out H-2/V-2/O-60/B-6.85

Please leave a thank you when you downloading for supplies.

my tag is just a guide...please use your imagination 
and make the tag your own you do not have to 
use any of the supplies I used.


     LET'S BEGIN

Open up Template and ShiftD and close original...delete 
copyright layer/close all layers/copy/paste paper of choice and
resize to fit canvas/layers/load/save mask/find your mask and
set with these setting/click ok


activate background layer
effects/AAA Frame/foto frame with these settings/click ok


On the following raster layers follow these directions...

activate large circle layer/copy/paste paper of choice resize 
paper/selections/invert on large circle layer/delete on paper 
layer/merge down/add drop shadow

activate medium circle layer/copy/paste paper of choice resize 
paper/selections/invert on medium circle layer/delete on paper 
layer/merge down/add drop shadow

activate medium2 circle layer/copy/paste paper of choice resize 
paper/selections/invert on medium2 circle layer/delete on paper 
layer/merge down/add drop shadow

activate medium3 circle layer/copy/paste paper of choice resize 
paper/selections/invert on medium3 circle layer/delete on paper 
layer/merge down/add drop shadow/leavesrectangleslayer as

leave left glittered rectangle layer as is/activate left rectangle 
layer/copy/paste paper of choice resize paper/selections/invert 
on left rectangle layer/delete on paper layer/merge down/add drop 
shadow

leave right glittered rectangle layer as is/activate right rectangle 
layer/copy/paste paper of choice resize paper/selections/invert 
on left rectangle layer/delete on paper layer/merge down/add drop 
shadow

Copy/paste your tube of choice/resize if needed/place across template
add drop shadow to tube

add any other elements you wish to use/resize if needed/add drop 
shadow to each element/place where they will look best

add your watermark and copyright credits/give it a slight gradient 
glow.....

To animate

close name-copyright-butterfly-both word art-clock-heart-tube
verticul rectangle-verticual glittered rectangle-umbralla-faded
rectangle and flower
copy/merge/paste remainder tag into animation shop/edit/duplicate
6 times/click on tag/delete 2x/you should have 31 frames
open up your animation/edit/select all
copy into selected frame 2x at different places
go back to psp/close layer you have open/and open layers you have 
closed/copy/merge/paste into animation shop/duplicate 6x/click on
tag/delete 2x/edit select all/copy into selected frame/place over
top of animation/make sure you paste in right place
check your tag if satisfied/save as gif

now give your tag to a friend.

You're done...thank you for trying my tutorial
please send me a copy so that I can show case it on my blog


1/3/14

CDO Ladyhawwk Designs and Anna Marine - Dark Secrets

Dark Secrets

This tutorial was written on Janurary 3,2014. 
Any similarities to another tutorial is purely coincidental.
All my tutorial are register with My Free Copyright. 
Please do not claim as your own.
This tutorial writer assumes you have a working 
knowledge of using Paint Shop Pro.
This tutorial was done in Paint Shop Pro9,
but can be adapted to use in other 
Paint Shop Pro versions.


SUPPLIES NEEDED

Tube of choice: I'm using the awesome work of Anna Marine.
Please do not use unless you have a license to do so. 
You can get her tubes HERE

Scrapkit of Choice: I am using PTU LadyHawwk Designs Anna Marine IB-41-3
Mini Kit... You can purchase it HERE ...Thank you Cat

Mask of Choice: I am using LPD Mask #102
If anyone knows who this is please email me...Thanks 

Filters used:Eye Candy 4000 gradient glow - HERE

Font for Name is Grunt Reaper
Copy write is always done in Pixelette  HERE


Dropshadow use through out H-2/V-2/O-50/B-5.00

Please leave a thank you when you downloading for supplies.


my tag is just a guide...please use your imagination 
and make the tag your own you do not have to 
use any of the supplies I used.


     LET'S BEGIN

Open up Template and ShiftD and close original...delete 
copyright layer/close all layers/copy/paste paper of choice
resize to fit canvas/layers/load/save mask/find your mask
and set with these setting/click ok/delete background


On the following raster layers follow these directions...

To begin you need to make a cluster frame,because I can not 
supply the one I made/copy/paste frame of choice/now choose
any elements you want to make the frame/be creative/every 
tag should be different,but yet simiral to mine/add drop
shadow to each element

once your cluster is made/copy/paste either a paper or a 
element for inside the frame/if you use a paper/copy/paste
paper/resize paper/selections/modtify/expand by 8/invert 
on frame layer/delete on paper layer/place underneath frame
add drop shadow to frame

keep this layer activated/copy/paste tube of choice/resize
if needed/place where it will look best/add drop shadow

add your main tube/resize if needed/place on opposite side
of elements/add drop shadow

add your watermark and copyright credits/give it a slight 
gradient glow ...now give your tag to a friend.

You're done...thank you for trying my tutorial
please send me a copy so that I can show case it on my blog